Wanna get planning a hike but not sure how? This guide has all the steps you need
With lockdown finishing and summer at the door, the plan for most of us is to spend AS MUCH TIME OUTSIDE AS POSSIBLE.
And from our last Ethical Adventure Community survey, loads of people said they wanted some tips on planning and advice for first-time adventures. So, that’s where this article comes in!
An epic hike is at the top of most people’s bucket list these days, and so it should be. It’s the chance to completely submerge yourself amongst nature’s finest, blow off some steam, do wonders for your health and eat some lunch with a cracking view.
But it does require some thought to have an awesome time on the trail.
These are our steps to planning day hiking trips, with all the tips you’ll need for safety, comfort and fun – all the hiking basics you need to cover!

Preparing for a day hike – Simple Steps
Planning an awesome hike comes down to only a few steps – they’re integral to a safe and fun time in the wild. They also form the foundation for learning to plan longer hikes too. It all comes down to three simple things: Where, When, and What.
Where do you want to go? When do you want to go? What do you need when you go?
Step 1. Where are you going to go hiking?
Typically, a day hike ranges from a half-day 11 – 19km (7 – 12 miles), or it can be a full day 19 – 32km (12 – 20 miles).
You always can go longer or shorter, and if you’re doing a multi-day adventure with camping be sure to check out our Tips for Planning a Backpacking Trip.
From this information, you can begin to pick your trail and start your plan.
Next Steps…
Give thought to the type of terrain you’ll encounter. Terrain plays a big part in the time it takes to complete a hike, so make sure you add that into your plans. Keep an eye open for scrambles, ridge walks, scree slopes, elevation gains, and any rivers or streams that may need crossing and will slow you down.
(There are tools listed below that you can use to scope out terrain pre-hike.)
Now, look at the trail type you want… are you looking for an out and back? Do you prefer a loop trail, or is it about the goal, destination, summit? What about the time it takes to reach the trailhead? Do you need to travel any distance to get there? Do you have to drive or is there public transportation?
Thinking about these aspects will help you pick the right route for you.
Before you head to the trail, there are a few more things to tick off your pre-hike checklist:
- Check for trail closures.
- Know your total distance and the time it will take to complete.
- What are your start and finish points?
- Where are the bail points if you need to get off the trail?
- Is there a drinking water source? If yes, where is it?
Once you decide the rough ‘where’ of your hike, that is is when the real research starts!
Explore more…
Simple Steps to Make Your Hiking More Sustainable
How to Find Vegan Hiking Boots
The Best Hiking Movies and Backpacking Films
More Hiking Articles
All our Outdoor Tips and Resources

1.1 Tools to Plan Your Hike
Good research starts with good tools. You can go out and buy a GPS tracking system; it can be a lifesaving tool. But, if it isn’t in the budget right now, you can use some of the ace free hiking planner tools instead.
Method 1. Online hiking maps and GPS
Online mapping tools, like Google Maps, or navigation apps like Maps.Me, OS Explorer, ViewRanger etc. show local/regional topographic maps along with hiking routes and route planning functions. They can be the perfect hiking tools and they’re free(ish)!
Example How-to:
- Go to chosen hiking mapper.
- Click directions and enter – From Milngavie to Fort William and press enter.
- Click on the little walking man icon above. The details list should populate.
- From that list, choose VIA W Highland Way.
- Your trail will populate, and you should see a little box that will give you your time and distance. At the bottom of the details strip is a little chart that gives you your elevation gain.
Et voila, you have your West Highland Way hiking route!

Method 2: Map and Compass
Want to know how to plan a hike in a traditional way? Use a map and compass. Though, be warned, this does require navigation skills and ISN’T suited to beginner hikers.
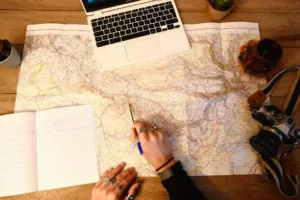
Topographic maps show hiking routes and areas of geographic importance. They can be a good way of planning and routing your trip.
The advantage of this is that you can easily see large areas of hiking trails and you’re not reliant on battery or service to navigate on the trail.
The negative side is that you need map reading skills to use this on the trail AND, when planning, it can be hard to estimate how long your route will take.
TIP: make sure you buy maps that are detailed/magnified enough (1:25,000 scale) to show footpaths and walking trails. Every map is different so map sure you’re familiar with the markings, legend and iconography. Ordnance Survey is the most common in the UK and REI has a great range for North America.
Method 3: Tourists maps and local guides
If you’re planning a hiking holiday or you’re visiting a new region, you can pick up simple maps and guides from tourist information offices. Sometimes they may list a number of good routes in the area which can be ace for trail inspiration.
This is normally only possible in popular hiking destinations where there is good trail signposting. You can use the guides/leaflets alongside trail markings to plot your route.
When you actually get on the trail, we’d definitely advise taking a secondary form of navigation too e.g. map and compass, GPS, GPS app.
Also, don’t forget to check with local hiking groups. They can give you tips you won’t find anywhere else.
For some more detailed tips on picking a route, our Guide to Hiking for Beginners has all the answers.
Step 2.When Will You Go Hiking?
Once you have the ‘where’ out of the way, you need to figure out when you’re going to go.
Some considerations:
- What is the forecast? Besides just staying dry, hiking in winter, hiking in the heat, hiking in the rain etc. will take you longer to cover ground and you’ll need to allocate extra time.
- What is the season and will it be busy? First off, you might want to avoid weekends or busy holidays when trails can become congested. Busy trails might take longer to cover so plan for extra time.
- What’s the terrain and how fast will you hike? 4km per hr is an average hiking pace but if you’re crossing ridges, going for summits etc. it will take longer.
These factors will help you plan your hiking journey, deciding exactly what time of day you’ll hit the trail and a good estimate of when you’ll finish.
For more outdoor content and adventure inspiration, be sure to sign up for our mailing list below!

Step 3. What Do You Need For the Trail?
What do you need to take hiking? That question is on the top of everyone’s list. Deciding what to bring falls into two basic categories. Category one is what you need; category two is what you want.
Let’s start with a solid hiking checklist for day trips:
- Backpack – a good hiking daypack will be about 20-30L. Make sure it fits well and has wide shoulder straps for comfort.
- Water bottle or hydration bladder (aim to drink roughly 1 litre every 2 hours, more in heat or for high-intensity hikes)
- Water filter if you need to fill up at a natural water source.
- Food – small, light, calorie intense, and plentiful. Make sure you bring enough – here’s a list of our favourite hiking foods.
- Small rubbish bag to carry out waste.
- Headlamp because you might end up on the trail later than intended.
- First Aid kit (make sure it has blister plasters.)
- Small survival pack for the unexpected.
- Firestarter.
- Map and compass or GPS navigator.
- Permits for your trail or any personal essentials
- Hiking Poles* this probably isn’t essential but for long trails they can be damn handy.
More items that will come in handy are insect lotion, sunscreen, and sunglasses. A beenie, buff, or a floppy brimmed hat. You can get a floppy hat that is good for both sun and rain. A portable battery and charging cable for your phone. A multi-tool and duct tape in case you need to make repairs. A good tip for duct tape is to wrap some around your water bottle!

What to wear hiking – LAYER UP!
Even on a day hike, you may go through many temperature and weather changes. This is especially true if you’re hiking at elevation. High in the mountains, the weather can turn quickly.
A good rule of thumb is four or five layers for the core. You can easily add them or stow-away as nature decides its intentions.
- Baselayer – pullover or T-shirt. Don’t go for cotton, go for a quick-drying and wicking material.
- Midlayer 1 – a pullover or light jacket.
- Midlayer 2 – an insulated jacket or similar.
- Outer layer/shell – Wind Shell or hiking rain jacket
For colder conditions, you can double up on your baselayers and midlayers. Try and opt for only one outer layer.
For the Lower Body
- Hiking trousers, or zip-offs that convert to shorts for warmer periods.
- For gals, hiking leggings can be a comfy option
- Thick-enough hiking socks and boots/footwear.
- Don’t forget rain trousers too, which are good for rain but also insulation as well.
A word to the wise. Don’t wear cotton, the saying on the trail is ‘the cotton kills’. Cotton may seem like a good idea because it is light and cool. The problem is that it absorbs sweat and is slow to dry. This can leave you vulnerable to chills and even hypothermia.
And what you WANT: this is purely personal, just remember you want to keep the weight down, especially if you’re planning a long hike or a particularly difficult one. Extras for us include photography gear, extra food and occasionally a book!
Check out our complete Day Hiking Packing List for more info on what to take with you on the trail

One Extra Point: Safety!
You never want to think about the bad stuff. But, you will never regret planning for what might go wrong. Risk management is a part of all good hike planning.
Before setting out on your adventure, do an honest self-check: is the trail you chose appropriate for your fitness and skill level? What kind of animals are you likely to run into? Do you have a check-in buddy who knows what trail you’re taking?
Tell someone how long you expect to be gone and when you expect to be back.
Your hike should be a fun and rewarding experience. Something that will give you happy memories in the years to come. Good planning will make that happen.
Now you know how you plan a hiking trip, get that trail on the calendar!
Your Hiking Questions Answered
What’s the best type of hike for beginners?
Do I need any kind of hiking fitness plan
Is planning a backpacking trip the same as for a hiking trip?
Should I invest in expensive hiking gear straight away?
How far should I plan for my first hike?


