Simple, honest, useful and actionable tips for your first bicycle tour
As with most outdoor hobbies, a successful bike tour takes a lot of trial and error.
And, in honesty, bike touring actually requires a bit more than most.
You have the normal elements to think about: navigating, gear, route planning etc. but then you also have the mechanics of the bike, getting comfortable and creating a touring set-up that won’t have your body screaming after a day in the saddle.
Once you get everything ironed out – boy it’s a sweet feeling – but getting to that point takes a bit of time. Jeez, there are loads of hard lessons we took from our first cycle tour… learning the hard way can be rewarding but it costs more, takes more time and can drive you up the wall.
For the people that don’t fancy that, we’ve put together these bicycle touring tips.
Actually, even if you do have the time you’ll probably appreciate them too. These are small little tweaks and considerations you can make BEFORE your trip and DURING, so you can just focus on pumping those legs and absorbing the experience.
It’ll save you headaches, grey hairs, money and probably quite a lot of chaffing too.
First things first: Don’t Get Too Stressed Out!
Whilst all these tips are important, the beauty of cycle touring is that it’s chilled. You can carry enough gear to suit different occasions and you can travel distances easy enough to pick up food and water. It makes it all pretty worry-free.
You can plan everything to a tee or you take a more relaxed approach and go with the flow. Basically, the key for a first tour is to make sure you enjoy it. If that means planning everything for reassurance – go for it. If it means packing your bags just before you leave and going without a route – that can work too.
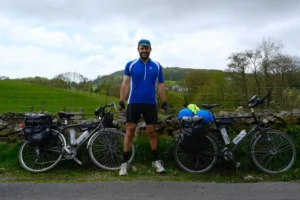
Despite what the gear enthusiasts might say, you only really need a bike, cycling clothes, camping gear if you intend to camp and perhaps panniers to carry your stuff. It doesn’t need to be top of the range either.
Sure, other bits will help but don’t let it stop you from cycling. As long as you’re safe, happy and can cycle comfortably, then I’d say you’re good to go.
Once you’ve got those aspects down, these cycle touring tips can help you polish up that trip and make it awesome!
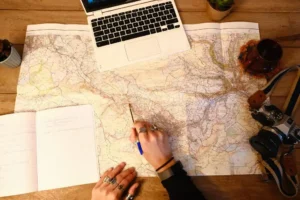
Pt. 1 – PLANNING
Go for a test run
This is seriously important: test out all your gear before you hit the road.
It’s also important to give it a good ride and not just pedal up the road. An overnight trip is best, with a nice cycle there and back. This will help you iron out any issues with your camping setup, bike, gear, food, navigating etc.
It’s also important to think about the weather. If I’ve got new cycle clothes or a waterproof, I’ll test it out and make note of the temperatures to see what it’s suitable for. It helps to plan trips and pack the right clothes. The same goes for sleeping gear and picking what season tent/sleeping bag/sleeping pad to go for.
Think about your navigating
Navigating can make or break your trip, particularly if you’ve got a time schedule to stick to.
Whether you’re going to be using a GPS, maps or road signs, it’s good iron this out on a test run.
For shorter multiday trips, we like to plot a route on RideWithGPS and then send the route to our phone to navigate on the app, using a simple phone holder. For longer trips or ones where you want to be more flexible/fewer time constraints, we’ll just use a cycling app (we tend to use RideWithGPS), put in our intended end destination for the day and let it work out the route for us.
Test your tent in the rain
This is another pretty crucial one, particularly if rain is likely.
Everyone loves a new tent, just make sure you’ve tested it in the conditions you’re likely to expect on the tour before you hit the road.
If you don’t have time for an overnight trip, you could camp in your garden. You can also use a hose to test the waterproofing too.
Looking for a 2-person tent? This guide can help.
Double-check your packing list
We’re big fans of packing lists. It doesn’t take long to put one together and helps to make sure you don’t forget crucial items.
For first-timers, our advice is to write down your bike touring gear list and then see if someone with more experience can look over it. They can help you add in or take away things which you might have overlooked.
Don’t know where to start? Check out our bike touring packing list for longer trips or our bikepacking packing list for lighter adventures. You can also send us your list and we’ll take a look for you.
Decide how rigid your route/schedule is before leaving
There are lots of different pros and cons to touring with a fixed route and schedule vs. touring with a flexible route/schedule.
The key thing is to have an idea of what you want before you go. If you know you need to stick to a strict route and time schedule then do that and embrace it. If you want to be more spontaneous, you can sit back and cycle to wherever looks interesting.
Don’t get too fixated on your bike touring gear
I brushed on this at the beginning but it’s pretty important. You can ruin trips focusing too much on the lightest, most expensive, most weather-resistant gear. If that gives you a buzz then go for it, but don’t feel like it’s the only way to have a successful trip.
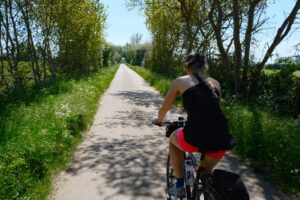
Check the forecast
Not only is it pretty pants touring in weather you’re not kitted out for, it can be dangerous too.
If it’s hot, you can save weight by cutting down the layers or warmer sleeping gear. You will need to bring sun gear and also plan for more water requirements.
If it’s cold or wet, you really want to be warm enough and be able to get dry at the end of the day.
Checking the forecast can help you tick both these boxes and more.
Have an idea about where you’ll sleep
If you’re planning on wild camping, try and finish your days close to places where finding wild camping spots will be easy.
The same goes to camping and campsites, or accommodations/BnBs etc. if that’s what you’re planning for.
Cycling with panniers is harder than cycling without them
If you regularly tear up the tarmac and can push out an easy 100 miles on day cycles, you might not be able to do the same touring.
Once you’re carrying gear, are travelling through new lands and are having to navigate, it takes a lot more time/effort. Factor this into your trip planning.
For a weighted tour on okay roads, expecting to average 10 miles an hour (with stops) is normal. So, if you’re planning a 60-mile day, it should take around 6 hours.
If you’re going off-road, it can take much more.
And on that note, elevation gain is important too!
Make sure to factor in the elevation gain each day. This is something we failed to do a lot in the early days.
If your day has thousands of feet of elevation, this is going to be significantly harder and slower than a flat route. The same goes for a long, straight route, which will be easy than a route with lots of twists and turns.
You can factor this in for days to be longer/shorter and also to plan in more food/water stops and refills.
Don’t push too hard for first tour
With all this in mind, it’s probably not best to aim too high for your first ride. Forget about bike training and go easy.
Aim to enjoy it rather than eat up the miles. Whether you feel comfortable cycling 10 miles a day or 50, make sure it’s fun and you’re not too dogged at the end of each day.
For a loaded first time tour, anything above 50 miles and it’ll start to get pretty tiring.
Opt for quieter roads
I guess this one is down to personal digression but we’d definitely prefer to cycle a slightly longer route and have less traffic. Being overtaken by speedy cars and breathing in loads of fumes isn’t fun.
This normally takes you along the scenic route too – can’t beat some good ol’ nature loving!
For more bike resources and adventure resources, be sure to sign up for our mailing list below!
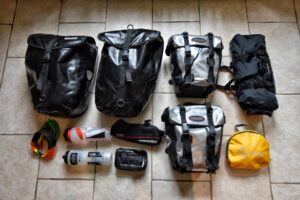
Pt. 2 – GEAR
Make sure your panniers are watertight
The last thing you want is to pedal through the rain and realise your pannier contents are soaked through.
Waterproof panniers are a super smart investment. These ones from Vaude are eco-friendly too. If you can’t afford waterproof panniers, you can get covers. Bin bags work too but can be wasteful for single uses.
If the panniers are letting water in, waterproof stuff sacks are good to keep all your contents in within the pannier.
Tight clothing
I’m not saying you need to get kitted out like a velodrome cyclist but tight clothing can really help to stop chaffing. It also helps reduce wind drag too.
Go for a nice tight pair of lycra shorts or leggings!
Is the bike-bum look always good for your trip?
Depending on your tour, you might not always want to be a smelly, dusty bike-bum.
If you’re going to be amongst civilised folk, it can be an idea to bring a top and trousers that are free from bike grease, mud and the last week’s munch.
Protect those eyes
If you’re hurtling downhill, blinding sunlight can cause some big issues. Bugs are also not nice to get in your eyes and sunglasses will shield them.
Keep that sunhat tight
A sunhat can really useful, particularly if you don’t deal with the heat well. Just make sure it’s tight enough not to fly off with a breeze.
More to explore…
Ride for the Wild: a 2,000-Mile Charity Cycling Challenge
Cycling the Hebridean Way: a Famous Scottish Cycle Route
Backpacking Vs. Bike touring: Which is the Ultimate Way to Travel?
All our Cycling Tips and Advice
Zip cables
You’ll be surprised how many bike/camping/general outdoor issues can be fixed with zip cables. It might not be a permanent fix but it’ll do until you can make a proper one. A bike touring essential fo sho.
Bring a water bladder
Water bottles are good for cages but it’s always good to bring a water bladder too. If you’re in more remote areas, you should fill up as much water as possible when the opportunity arises. A 3L water bladder is easily stored and is the most weight-effective way of carrying around lots of litres.
Bring the right tools, but not too many
Depending on how remote your trip is will depend on the tools or spares you might need.
If you’re going to be cycling through developed areas, it’s good to take a puncture repair kit, allen key set, multitool and a pump. Basically, the things you need to make small bike modifications, take off wheels, change tyres, adjust seat etc.
If you’re going to travel through areas without a bike shop and away from civilisation, this is when you might want to start thinking about spares, like brake cables, spokes, inner tubes etc.
Bring lights
Safety is pretty important, as is seeing where you’re going. It’s really easy to end up cycling in darkness, whether that’s because you’re running late or maybe you just like evening cycling. Going through populated areas without lights is a big no-no for safety. In less populated areas without streetlights, you won’t be able to see where you’re going.
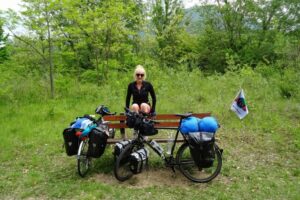
Pt. 3 – BIKE & SETUP
Get comfortable
For bike tours, you need to be comfortable spending long periods of time in the saddle.
This deserve a whole article but it’s definitely worth adjusting some of elements below to see what works for you:
- Saddle, seat height and angle
- Peddles and toe clips
- Handlebar height, stem length and handlebar style
You want your weight to be evenly distributed between the contact points on your hands and bum, without strain on your upper or lower body.
If you’re struggling with comfort, a professional bike fit can do wonders. This is where a bike whizz measures you and recommends the ideal bike fitting for your needs. It’s definitely an investment but it’s worthwhile if you’re planning a longer bike tour and your ride isn’t feeling good.
Compartmentalise you gear
Whether you’re rocking a traditional bike touring setup or you’ve gone for bikepacking, make sure your gear is organised in your bags and easy to get to. This means knowing exactly which bag has what stuff. It’s a huge time-saver.
For bigger panniers, we like to split things into waterproof stuff bags inside. They’re easily compressed and pulled out when you’re in a rush.
Prioritise essentials
Make sure all your essentials are easily stored and quick to get to. We like to keep snacks, often-used medicals, sunglasses, wallet, camera etc. in a handlebar bag to get to quickly.
In your larger panniers, put the things you’ll need more often on top. Things like cooking pots and camping gear can go further down whilst bike tools or warmer layers might better to keep handy.
Layers on hand
On a bike, conditions and temperatures can change quickly. It’s always good to keep additional layers somewhere simple to get to. I like to keep a waterproof/windbreaker strapped to my top rack and have gloves in my frame bag. Both can be accessed without getting off the bike.
Think about your tyres
This isn’t one to get really hung up on, but tyres can make a big difference. Specifically, picking tyres with good puncture resistance. Sure, certain tyres have better roll or traction on different surfaces but, personally, I think you can make any tyre work if you’ve not got too high expectations of efficiency.
Getting regular punctures, on the other hand, is absolutely ball ache. We go for Schwalbe Marathon tyres as they’re good all-rounders and you can cycle on horrible terrain without too many worries about flats.
Pt. 4 – FOOD & DRINK
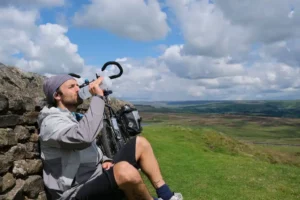
Nutrition is important
What you eat, drink and consume on a cycle tour can leave you feeling great or pretty shitty.
If you’re used to having a super healthy, nutritious diet, straying too far from it on a long-distance trip can have you energy-sapped and feeling crummy.
You can easily bring multivitamins on trip. We like to bring protein powder and a green powder for lots of nutrients without packing in too much weight.
Eat little and often
If you’re spending a whole day cycling, you’ll be able to maintain the most energy by eating small amounts regularly. Then you can have a bigger lunch in the middle of the day and load up at dinner.
We LOVE energy balls and flapjack for easy-to-eat energy.
You’ll find lots of other vegan energy foods here
Salt at end of the day
It’s really important to replenish lost salts if you’ve been sweating all day, but do it at the end of the day. If you eat tonnes of salty foods at lunchtime or in the morning, you’ll feel dehydrated and will be tearing through your water supplies like nobody’s business.
Make sure you can carry enough food and water
It’s all well and good going superlight but if you can’t carry any food or water you’ll be stuffed. Have enough room to carry at least a few litres of water; for warmer trips, definitely more.
Bringing a lightly-packed pannier can also be useful for picking up food or ingredients for the day. If all your bags are crammed, this will be a struggle.
Pt. 5 – EXTRAS
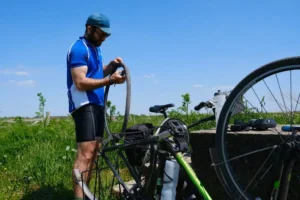
Brush up on your bike maintenance
You don’t need to be a fully-fledged bike mechanic but some knowledge is invaluable, particularly for rides to more remote areas.
Things like changing tyres, inner tubes, brake cables and pads, adjusting bike seats and parts etc. they’re all surprising simple but really help when you’re on the road.
Don’t underestimate vaseline, or chafing.
Chafing is no joke. Vaseline and similar lubricants are the answer.
Leave no Trace
As with any outdoor trip, it’s damn important to protect the places you’re exploring. These Leave No Trace Tips and eco cycle touring tips can help to protect the places you ride.
Say hello, and say yes!
Particularly if you’re packing heavy, you can stand out as a cycle tourer and draw quite a lot of attention. It’s always nice to communicate with the locals and you can expect a lot of curious questions about your trip.
Cycle touring is an absolutely beautiful chance to experience local hospitality, whether that’s people inviting you to stay, offering you food or drinks. These types of encounters can really make a tour so try and say yes as much as your trip allows!
Respect the local customs
What might be tolerated at home may be frowned upon in other lands. Follow local norms and customs, being respectful of their culture, then you’ll avoid any offences and likely make plenty of chums (rather than angry villagers outside your tent!).
If you’re travelling to far-flung lands, it can be good to do a bit of research beforehand so you know what to expect.
