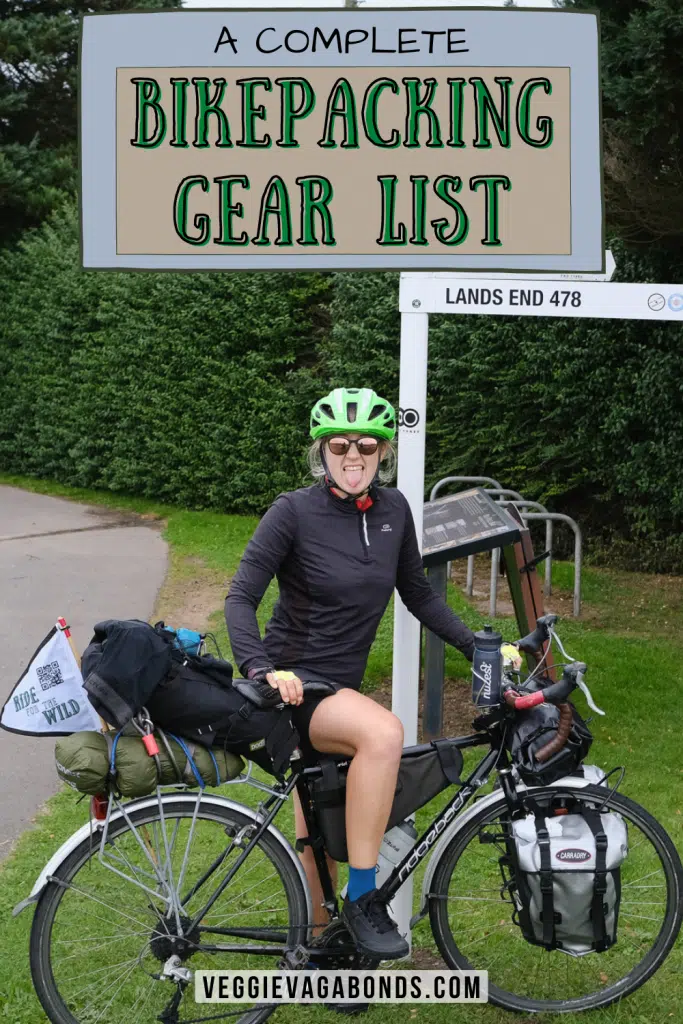
A complete breakdown of our thoroughly tested essential bikepacking gear list, with everything you need but nothing extra
In September/October 2021, we took on our Ride for the Wild challenge.
A 2,000-mile journey to all of the 15 UK national parks. We did it unsupported, camped along the way and attempted to do it in 30 days (it ended up taking 40…). It meant travelling as light as possible and cycling up to 60 miles a day in some of the UK’s hilliest and most remote regions.
Whilst aiming to cut the pounds, we still needed cycling gear to cover us for early winter cold and bike mishaps. On top of that, we wanted to be able to cook decent grub and have enough comfort for 30+ days in a tent.
We spent months whittling it down and building the best bikepacking packing list possible. This is exactly what we took.
It was light enough for hard 60-mile days, easy to load on and off each day. At the same time, it wasn’t a crazy ultralight bikepacking gear list with sawn-off toothbrushes. We had enough comfort to keep riding for over a month, nothing extra, and it didn’t break the bank.
Hopefully it can help you put together your own bikepacking essentials list, suited to your own trip. We’ve thrown together lots of tips but for any more advice, just drop us a comment at the bottom!
We’ve broken it down into the section below:
- Bikepacking sleep system (tent, camping pad, sleeping bag, pillow etc.)
- Cooking system and hydration
- Food
- Cycling clothing for both men and women
- Electronics and charging
- Tools, safety and extras
- Bikepacking setup and bags for storage
Before we jump in…
From planning a warm bikepacking overnight gear list to winter weekend rambles and cross-continent trips… every ride is different and no two gear lists will be exactly the same.
Creating the perfect list of things you need for bikepacking trips will depend on your route, duration, terrain, climate etc.
All this bikepacking equipment was put together to share between two people be and self-reliant for a month in autumn around the UK. This meant preparing for potential sun, wind, rain and even snow, with temperatures from 15°C to around freezing.
It’s best to use this list as a reference or template, then make the necessary tweaks and changes for your ride.
Remember: the key to successful longer distance bikepacking trips is having everything you need but nothing extra.
Be sure to head out on lots of trial runs and overnighters to test it all out before you properly hit the road.
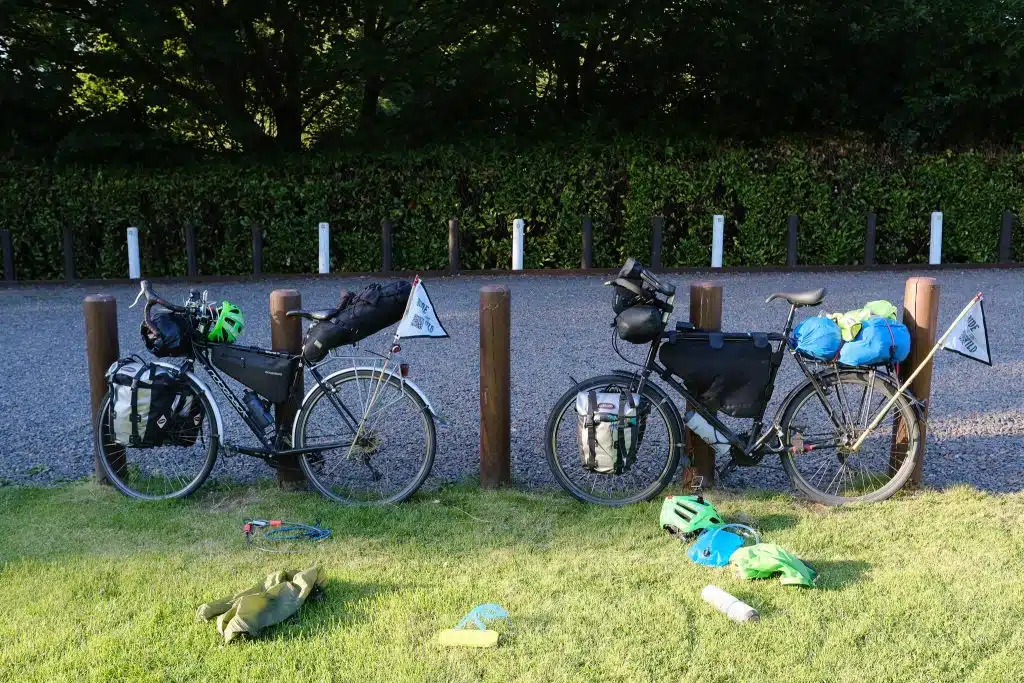
And our bikes?
We won’t go into a full-blown breakdown of what makes the best bikepacking bikes, but here’s our personal choice.
I rode a Surly Long Haul Trucker with 26″ wheel, Schwalbe 1.5 Marathon Plus Tyres, a 3×9 groupset with an 11-36 rear cassette and butterfly handlebars.
Sarah rode a Ridgeback World Voyage with 27.5″ wheels, Schwalbe 1 1/4 Marathon Plus Tyres, a 3×9 groupset with an 11-36 rear cassette and drop handlebars.
They probably wouldn’t get the popular vote with today’s gravel and adventure bike craze, but they hold up awesome for loaded road tours when comfort and distance is a priority.
This is how it was all used… our Ride for the Wild adventure!
Bikepacking Sleep System (total weight – 2.94/3.11 kg)
Besides your bike, this is probably the most important area to focus on. At the end of a hard day, you need somewhere safe to crash. It needs to be comfortable, with the right level of protection from the elements.
It’s all well and good just opting for super lightweight bikepacking gear, but if you’re not getting a good night’s sleep, you’ll struggle.
Invest in these items and save on other elements.
*Some people go for a ‘credit card tour’, staying in accommodation and buying ready-made food. You don’t need any sleeping or cooking gear and you save a lot of weight. On the other hand, it’ll cost you a lot more money and very much change the dynamic of the trip. See what works best for you.
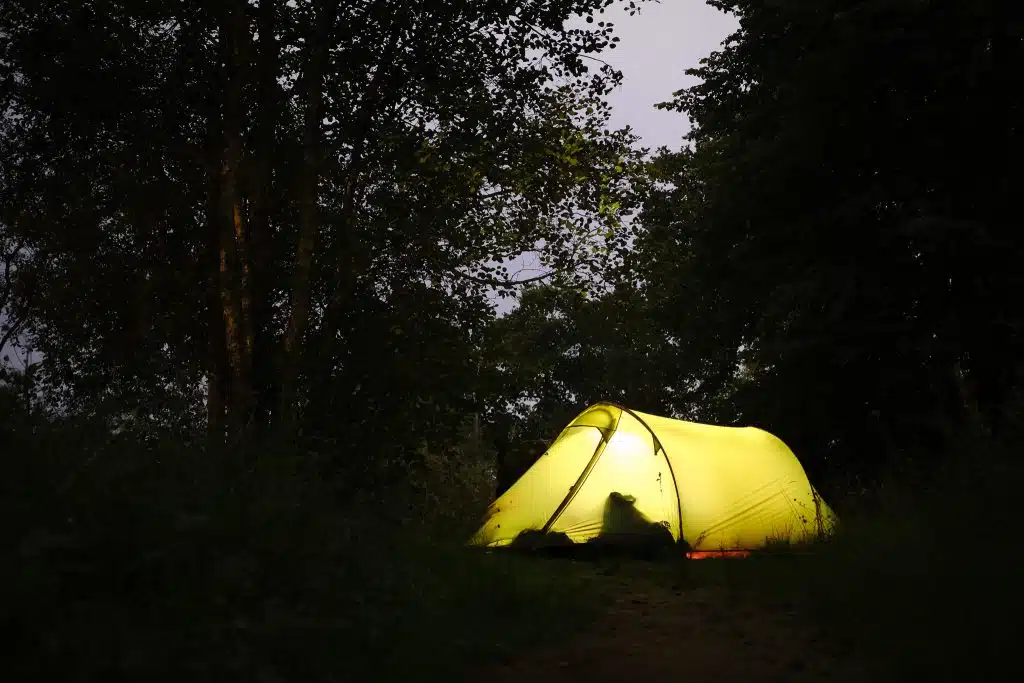
Lightweight Bikepacking Tent – Vango UL Xenon 2P (1.64kg)
This is a great little 3 season tent for bike tours. It weighs 1.64kg, has very good living space and a big front porch area for your bags and cooking. The fly and inner can be kept together for super quick pitching and it’s a strong performer in heavy wind/rain.
On the negative side, it’s not free-standing costs a little over £400. Overall, a solid 2-person bikepacking tent.
Camping pad/sleeping pad – Vango Aotrom Short (300g) or Thermarest Neoair Xlite (470g)
For summer and warmer weather, the Vango Aotrom is a really lightweight sleep pad that’s impressively durable. It’s less than £50, only 30g and packs down to the size of a smaller deodorant can. It’s really nice and comfortable but it’s a third-size so only used for warmer conditions.
For colder weather, we use the Thermarest Neoair Xlite, which is slightly larger and heavier but seriously warm in freezing conditions.
Both are good for side sleepers.
Sleeping bags – Vango Ultralite Pro 100 (900g)
Some synthetic sleeping bags have better warmth to weight ratio and compressibility, but these are less than 1kg, very affordable and good for temperatures above freezing.
Inflatable camping pillow – Alpkit Drift (100g)
Personally, I find a pillow crucial for a good night’s sleep. You can go for just chucking some clothes in a dry bag, but I sleep better with a proper pillow. At only 100g, I think it’s worth it.
We’ve tried a bunch of different pillows but the Drift from Alpkit has now become one of our bikepacking essentials.
String fairy lights
The lightest, cheapest and most energy-efficient lighting we’ve used. Super cheap and they look pretty too.
Bikepacking cooking system and hydration
Some people really like to cut weight on bikepacking cooking gear, just going with a minimalist pot and stove. Personally, we find that it’s not enjoyable for longer trips. If you’re cycling over a week, you really need to be eating the right food. That’s when better cooking equipment comes in!
As mentioned above, you could buy ready-made food, though this can be unreliable, expensive and much less healthy.
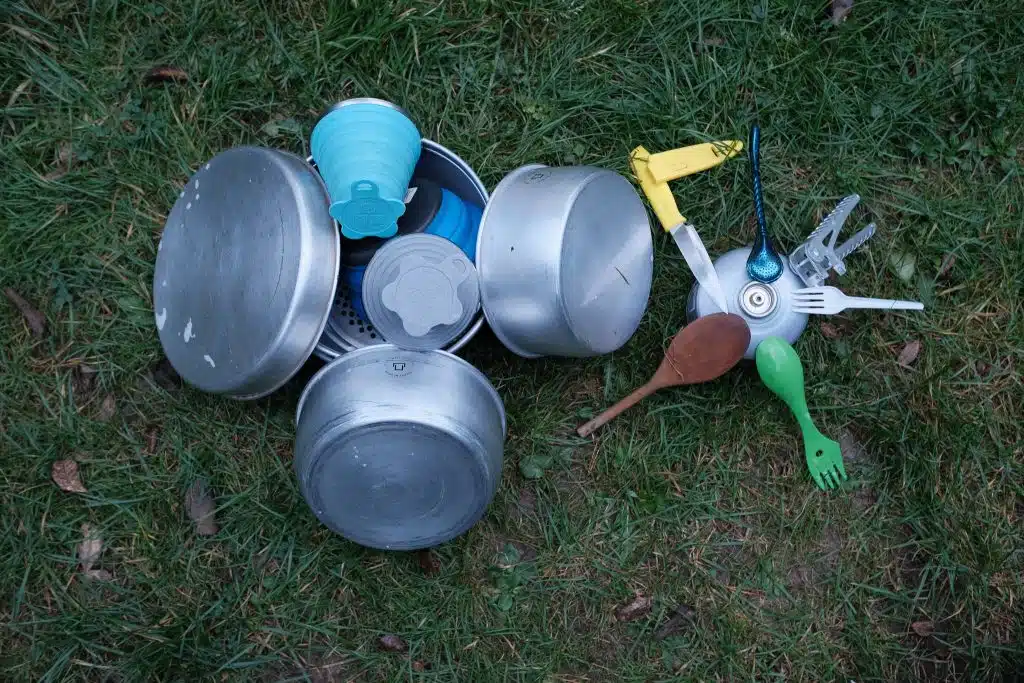
Cooking system – Trangia 27-1 UL 1-2 Person Camping Stove (960g)
This includes:
- Highly effective windshield
- 2x pots, 1x lid/frying pan
- Gas burner
- Handle
If you want to be able to cook decent meals then a Trangia camping cooking set is ace. They’re super hard-wearing, compact and efficient. It weighs 960g but all parts fit together nicely – roughly to the size of the large cooking pot – with room to store extra bits inside too.
This windshield is really effective and you can comfortably cook outside of shelters even in strong winds.
It is heavy, but for two people who like good food, it’s cracking.
Packed into the Trangia cook set, we fit:
- Collapsible cups and bowls
- Sporks
- Tea towel and sponge
- Lighter
Then a gas canister is carried separately. This all weighs about 400-500g.
Hydration and water storage
On one bike, we have a 3-litre water bladder and a 1-litre water bottle.
On the other bike, we had 3x 1-litre water bottle and a spare 2-litre bladder as a backup.
More info on the set-up, water storage and mounting bottles towards the end of the article.
Want more adventure fodder and bikepacking resources? Sign up for our Ethical Adventure Newsletter below!

Food for Bikepacking Trips
I won’t go into too much detail as we covered it extensively in our Guide to Vegan Bikepacking Food and Cycle Touring Munch. That article goes IN DEEP!
Typically, there are some staples we always carry with us and then pick up food along the way. For bikepacking trips with regular shops and amenities, we’d pick up our daily food each morning.
Staples we try to keep with us include:
- Porridge mix (oats, seeds, raisins)
- Peanut butter
- Jam
- Brown rolls
- Dried fruit
- Energy bars
- Seed and nut mix
- Coffee and tea
Then we’ll pick up fresh items for lunch/dinner each morning. Love raiding the reduced aisle!
The weight depends on how far through the supplies we are. It’s always a tough day when we pick up fresh peanut butter, jam and porridge mix at the same time.
3-Season bikepacking clothes
This is definitely an area that can be easily overdone. It’s tricky trying to balance clothing so you’re protected from the elements but aren’t weighed down either.
We always take cycling clothes and a spare set of cycling clothes, additional clothing for cold/rain and evening/camp clothing.
J’s Bikepacking clothes
Cycling clothes
- Cycling shoes –
Pearl Izumi X-Alp Flat Pedal Shoes - Cycling socks
- Padded cycling shorts
- Over shorts with pocket
- Cycling jersey
- Warm second layer
- Waterproof jacket –
Decathlon Hi Vis Waterproof Cycling Jacket
Second set of cycling clothes
- Warmer cycle socks
- Warmer padded cycle tights
- Warmer cycle jersey
Warm layers, protection & extras
- Cycle glasses
- Buff
- Gloves
- Insulated jacket – Arc’teryx Atom LT (
If you’re serious about outdoor adventures, don’t miss our roundup of the Best Arc’teryx Jackets. - Waterproof trousers
- Head gaiter –
Seal Skinz Head Gaiter - Thermal compression top and bottoms – Sub Sports top and bottoms
- Overshoes
Camping/evening clothes
- Insulated PJ top
- Insulated PJ bottoms
- Warm socks
- Fleece
- Gloves
- Warm buff
Sarah’s Bikepacking clothes
Cycling clothes
- Cycling shoes –
Shimano GR5 Flat MTB Shoes - Cycling socks
- Padded 3/4 length cycling shorts
- Sports bra
- Cycling jersey
- 2x light mid layer
- Waterproof jacket – Rab Downpour Eco Rain Jacket
Second set of cycling clothes
- Spare cycle socks
- Spare warmer padded cycle tights
- Spare warmer cycle jerseys
Warm layers, protection & extras
- Cycle glasses
- Buff
- Gloves
- Insulated jacket
- Head gaiter –
Seal Skinz Head Gaiter - Thermal compression top and bottoms – Sub Sports top and bottoms
- Overshoes
Camping/evening clothes
- Insulated PJ top
- Insulated PJ bottoms
- Warm socks
- Fleece
- Gloves
- Pants
- Warm buff
Some more useful bikepacking resources
The Ultimate Guide to Big Adventure Planning
A Cross-Continent Bike Touring Packing List
The Best Cycling Documentaries and Bikepacking Films on YouTube
Cycling the Hebridean Way: A Complete Guide
All Our Cycling Content
Electronics and charging
We like to document our trips and so take more electronics than some. Still, it all packs down fairly well and is all kept safe in dry bags and cases.
Camera & case – Fujifilm Xt-30 with Fuji 23mm f2 lens
I think this is such an awesome little travel/touring camera. Very small and robust but with excellent image quality. The perfect little adventure capturer. My only wish was that was weather sealed. Its older brother, the Xt-4, is weather sealed but is more expensive and heavier.
The 23mm prime lens is also absolutely brilliant. Seriously small and light but beautifully built and dead sharp. With the Xt-30, it’s my go-to adventure combo.
Gopro Hero 9 action camera
Pretty remarkable video quality from such a small device. Waterproof, tough and ready to film virtually anything you’re physically able to do.
Phone – Samsung A71
A good compromise between price, battery life, performance and camera. I’m by no means a phone expert but it’s pretty good for touring and can take a good battering.
Battery pack
We use a 25,000 mAh power bank that’s pretty rugged and supposedly waterproof… it’s definitely splash-proof. It will charge a phone about 8 times.
Pedalcell Rim Dynamo
Having on-the-go energy is damn useful on tours because finding spots to charge is a nightmare.
The Pedalcell is strapped to your bike rim and uses kinetic energy to charge electronics/battery pack. We found it to work great for flatter regions but it can be a struggle to use efficiently in hilly areas.
Kindle, spare memory cards chargers
Bikepacking Tools, Safety & Extras
Although it can be easy to neglect, it’s worth spending a bit of time looking at these smaller bits of equipment. Some weigh next to nothing, packing away super easily, but can completely save a tour!
- Survival bag – flint sticks, compass, water purifying tablets, emergency blanket, matches, duck tape, safety pins, SAS mini survival book
- Tools – Bike multi-tool with allen keys, torque set, spoke adjuster, link breaker etc. adjustable spanner
- Spare inner tube, brake cables and chain links
- Petzl Swift RL headtorch
- Pump
- Puncture repair kit with levers
- Bike lube – Finishline Wet Lub
- Leatherman Wave
- Water filter –
Sawyer Squeeze water filter - Zip cables
- Dry bags
- Bike lights
- Towel
- Wallet
- Phone holder
- Helmet
- Facemask
- Tooth brush and paste
- First aid kit and any medical items
You can find out complete Bicycle Repair Kit and Guide here
Bikepacking bags, setup and storage
We completed our Ride for the Wild challenge as a pair and shared out the gear between us. Both our bikes had slightly different setups, racks, mounts and storage.
Below you’ll find a rundown of what we each carried, how and with what bike bags.
Josh’s Bike (total carrying capacity 95l + bottle cage)
I had a front and rear pannier rack. There was a 1l bottle mount on the underside of the downtube and a 3l water bladder in the frame bag. I also had the Pedalcell attached to my rear wheel.
- Front pannier 1 (
Carradice Carradry 20l panner ) – Cooking equipment, survival bag, spare bike parts - Front pannier 2 (Carradice Carradry 20l panner) – Electronics, extras, food and supplies
- Back rack with dry bag – 30l heavy-duty dry bag strapped to rear pannier rack containing 2x sleeping bags, 2x camping pads, 2x camping pillows, thermal backup layers and winter gloves.
- Handlebar bag (
8l Lotus Waterproof Cycling Handlebar Bag ) – Second pair of cycling clothes and evening clothing. - Additional handlebar strap on (
Giant Waterproof Saddle Bag 1.5l ) – Actually a saddle bag I fashioned into a handlebar bag. Perfect size for fitting a mirrorless camera. - Frame bag (
Moosetreks 14L Bike Frame Bag ) – All additional cycling layers (gloves, buff, 2nd layer, waterproof, gaiters, waterproof trousers) plus 3l water bladder with mouthpiece fed through to handlebars. It also had a battery pack, wallet, chargers and snacks. - Top tube bag (
1.3l Zefal frame bag ) – I actually strapped this between the seat tube and the rear wheel. It contained all bike tools, puncture repair kit, pump, headtorch and penknife.
Sarah’s Bike (total carrying capacity 70l + back rack and bottle cages)
Sarah’s bike featured a rear pannier rack and a front pannier rack. For water, she has a bottle cage on the down tube, a handlebar bottle mount and kept an extra bladder in a pannier.
- Front pannier 1 (
Carradice Carradry 20l panner ) – Kindle, first aid, toiletries, extras, spare bladder, fairy lights, water filter - Front pannier 2 (Carradice Carradry 20l panner) – Food and supplies
- Tailbag (
PodSacs Waterproof Saddle Pack 11l ) – Insulated jacket, waterproof layers, overshoes, gloves, waterproof head gaiter, thin mid layer, additional room for food - Back rack – Tent strapped to back wrack.
- Handlebar bag (
Lifeline Adventure Bikepacking Handlebar Bag 11l ) – Second pair of cycling clothes and evening clothes - Frame bag (Waterproof Bikepacking Frame Bag 8l) – Purse, chamois cream, keys, phone, tissues, head torch, bike lights, hand sanitiser, mask and other misc. items.
A final word when deciding on your bikepacking setup and gear
In the last few years, bikepacking and gravel cycling have gone through the roof. Unlike its traditional bicycle touring sibling, there seems to be a much bigger commercial aspect to it. And it can be easy to think you need the absolute best bikepacking gear, cutting down every inch of weight and following all the latest trends…
Personally, we think this mentality can take the pleasure away from riding and even stop you from getting outside.
It’s always good to shop sustainably and pick hard-wearing products that will last. This doesn’t always need to be the most expensive. Read some reviews, perhaps pick up second-hand items and do your own testing. Most importantly: don’t feel like you can’t have a cracking adventure with ramshackle gear.
We hope our bikepacking equipment list can help to give you a good template, then you can explore options for your own ride!
Remember, for any additional tips or advice, just drop a comment below
